The script includes all the files required to install the application on your server. You do not need to use composer commands to install the script.
Follow instructions below:
The script's installation is quite simple. Please follow the steps outlined below.
- Purchase and download the zip archive of script from authentic source.
- There are two different directories available in the zip file (1) admin (2) tenant
- Upload the zip archives to your server to '/var/www' directory.
If you wish to install this script on Live Server, please use a top level domain (For ex. yourdomain.com). Point your top level domain (yourdomain.com) & its wild-card sub domain (*.example.com) to your server IP.
If you wish to install this script on Local Server, please use a virtual host (For ex. yourdomain.test) to access the script. The virtual host should point to the "public" directory. There are many resources available for Virtual Host depending upon your Operating System & Server you are using.
If you are using port or IP as your URL for local server installation, you will need to change below variables in the .env file
If your installation URL is 127.0.0.1:8000
APP_URL="http://127.0.0.1"
SESSION_DOMAIN="127.0.0.1"
SANCTUM_STATEFUL_DOMAINS="127.0.0.1:8000"
If your installation URL is localhost:3000
APP_URL="http://localhost"
SESSION_DOMAIN="localhost"
SANCTUM_STATEFUL_DOMAINS="localhost:3000"
- Create server block for your top level domain at '/var/www/admin' and make sure server block root is '/var/www/admin/public'
- Create server block for your wild-card subdomain at '/var/www/tenant' and make sure wild-card subdomain server block root is '/var/www/tenant/public'
- Install SSL for both the top level domain & wild-card sub domain.
- Create a simple index.php file with "Hello World!" content under '/var/www/admin/public' directory & navigate to your browser at https://yourdomain.test/index.php. You should be able to see "Hello World!".
- Create another index.php file with "Hello World!" content under '/var/www/tenant/public' directory & navigate to your browser at https://anything.yourdomain.test/index.php. You should be able to see "Hello World!".
- Extract the uploaded zip archives at '/var/www' directory.
- Move the content of admin directory to '/var/www/admin'
- Move the content of tenant directory to '/var/www/tenant'
- Edit the /var/www/admin/.env file and TENANT_PATH variable to "../tenant/"
- Navigate to the https://yourdomain.test in your favorite browser. If your server fulfills all the pre-requisites then you must get the installation wizard as shown in the screenshot below:
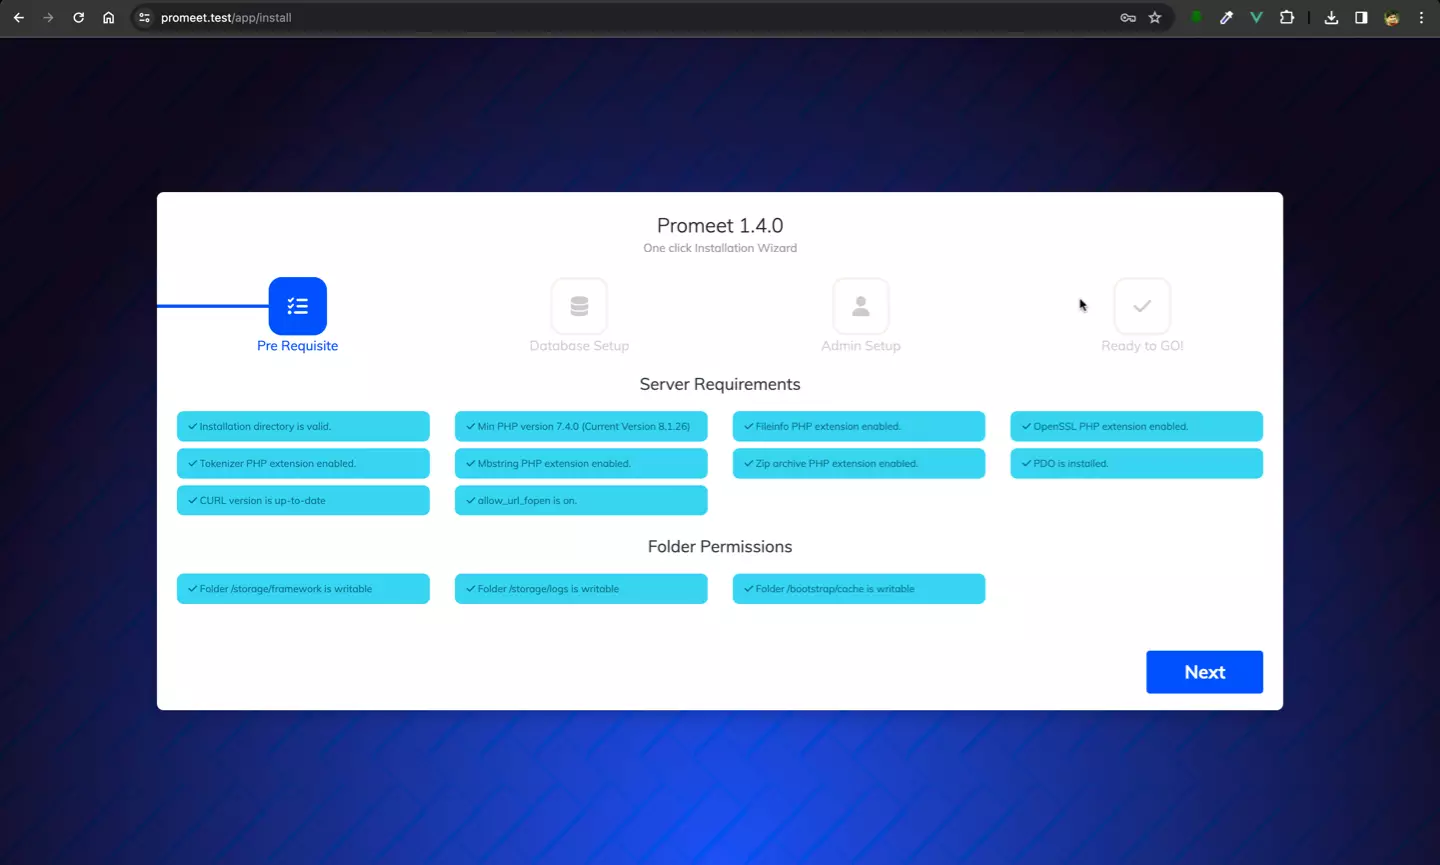
The green alert shows your requirements are fulfilled. In case it doesn't, you will be a read alert box with the error description.
Click on the next button to move to Step 2.
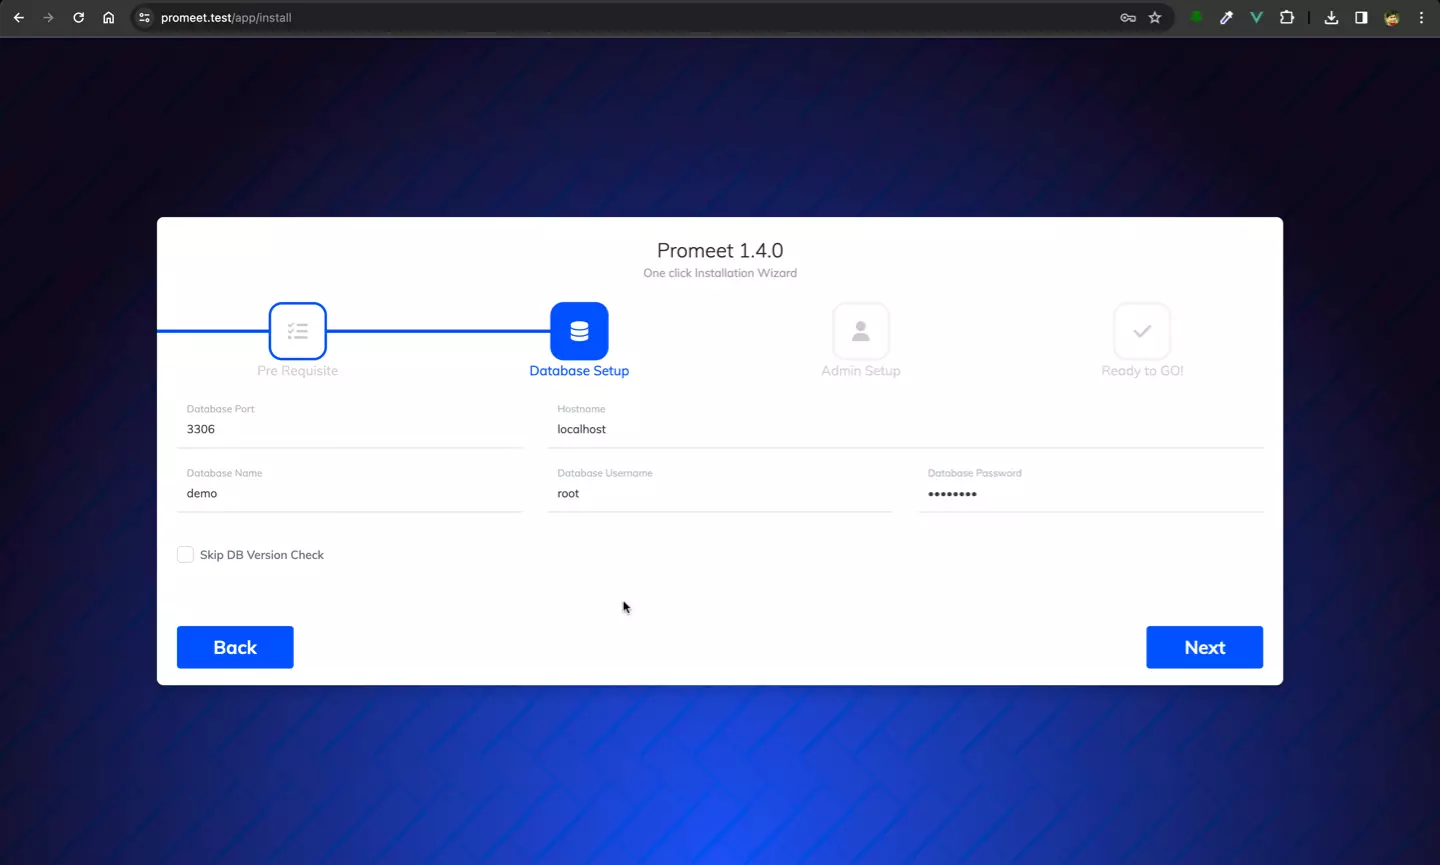
Enter your database credentials to proceed. You might get an error in case database connection could not be established due to invalid database credentials.
Make sure your database doesn't have any table. The script will create required tables at the time of installation.
Click on the next button to move to Step 3.
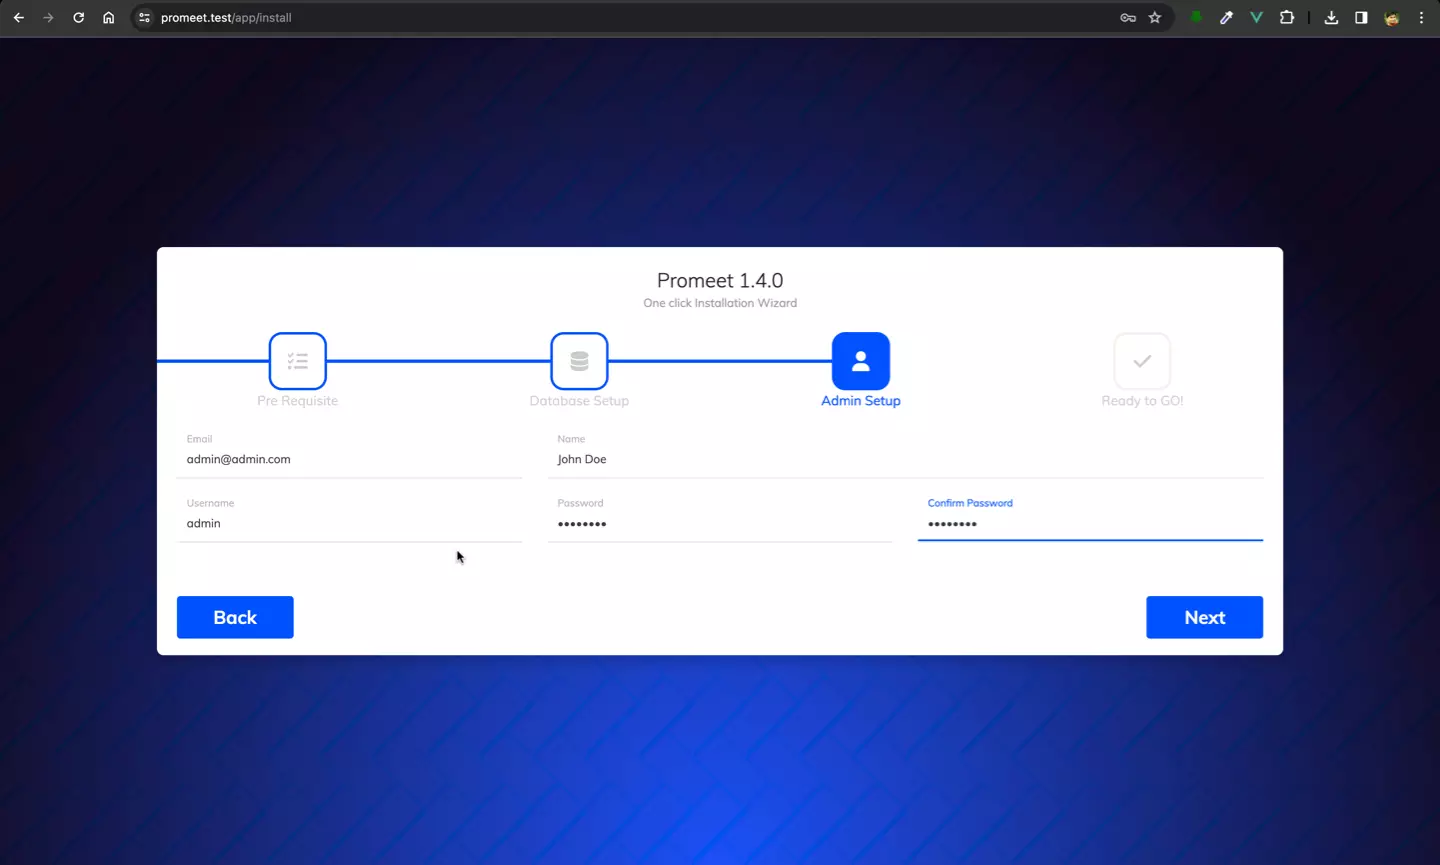
Enter your user login credentials to proceed. This user will have admin access to perform various operation.
Click on the next button to move to Step 4.
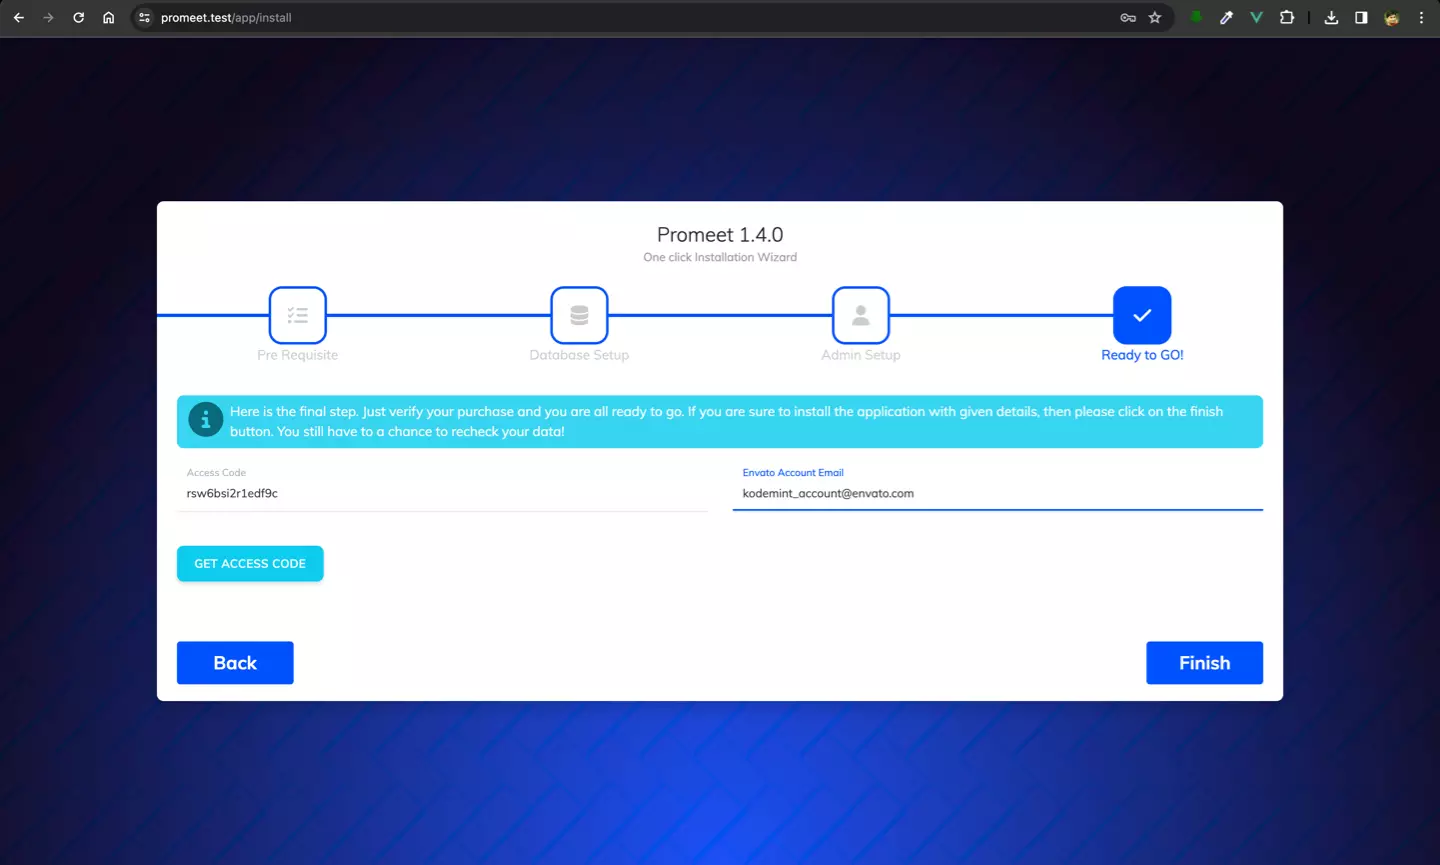
In this last step, you will need to enter your license information. You need to generate "Access Code" for every domain/sub domain where you wish to install.
To get the access code, navigate to https://auth.kodemint.in, register or login with your Google, Github or Envato Account.
Your purchase should be listed in the dashboard or Go to the Purchase menu from sidebar & click on the details of your purchase, you can then add your domain/sub domain where you wish to install.
Enter the access code and registered email and click on the finish button to complete the installation.
Usually it takes around 15-30 seconds to install the script but if your server has low resources (hardwares) then it might take upto 5 minutes. In that case, you need to make sure that your PHP Max Execution Time Limit is atleast 300 seconds.
Once your installation is completed, you will be redirected to login page. You will need a refresh here as the script generates some new encryption key. If you don't refresh, you might get "CSRF Token mismatch" error.
Now your PromeetSaaS application has been installed!
Things needed after installation


